Plan Renovation Debris Before the Bin Arrives
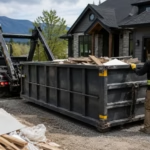
Choosing the right bin size for your renovation project can prevent overfilled bins, extra hauls, blocked driveways, unsafe loading, and job-site delays. Renovation debris often builds faster than expected, especially when cabinets, flooring, drywall, tile, fixtures, packaging, and old household items are removed at the same time.
A bin that is too small can interrupt the work. A bin that is too large can be difficult to place, especially on tight residential lots, strata properties, laneways, or active construction sites. The best option depends on the project scope, debris type, material weight, access, and how long the bin needs to stay on-site.
Rocky Junk Removal supports homeowners, contractors, property managers, and commercial clients with bin rental, construction debris removal, renovation debris hauling, and junk removal across Vancouver, Burnaby, Surrey, Richmond, Delta, Langley, Abbotsford, Maple Ridge, Chilliwack, Pitt Meadows, and the broader Lower Mainland. This guide explains how to choose the right bin size for your renovation project before debris starts taking over the work area.
Why Bin Size Matters During Renovation Cleanup
Bin size affects the entire cleanup process. It determines how much debris can be staged on-site, how often material needs to be hauled away, where the bin can be placed, and whether the project team can keep working without debris blocking the next step.
For small projects, a compact bin may be enough. For larger demolition or multi-room renovation work, the bin may fill quickly if it contains cabinets, drywall, flooring, trim, doors, packaging, and old fixtures. The right bin size for your renovation project should match the actual debris stream, not just the number of rooms being renovated.
Material weight matters as much as volume. A bin filled with carpet and cardboard is very different from a bin filled with tile, concrete, plaster, brick, or soil. Heavy debris can reach safe hauling limits before the bin looks full.
Good bin sizing also protects the property. A well-sized bin can reduce loose piles, repeated handling, and clutter in driveways, garages, yards, or job sites. This gives contractors, homeowners, and trades a cleaner space to work.
9 Smart Ways to Choose the Right Bin Size for Your Renovation Project
The right bin size for your renovation project is easier to choose when you review the job in practical steps. These nine points cover the main details that affect bin choice.
1. Start with the type of renovation
A kitchen renovation usually creates bulky debris, including cabinets, countertops, flooring, backsplash, packaging, and sometimes appliances. A bathroom renovation may create less volume but more dense material if it includes tile, mortar, tubs, toilets, vanities, and drywall.
Flooring projects, basement renovations, deck repairs, garage cleanouts, and full interior remodels all produce different debris profiles. Before booking, describe the renovation clearly so the provider can recommend the right bin size for your renovation project.
2. Separate volume from weight
Volume tells you how much space the debris occupies. Weight tells you how much the truck must safely haul. A large bin may handle bulky wood and cabinets well, but it may not be safe to fill that same bin with concrete, tile, brick, or wet demolition material.
If the project includes heavy debris, ask about weight limits before loading. The right bin size for your renovation project may be smaller than expected when dense materials are involved.
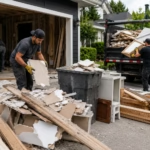
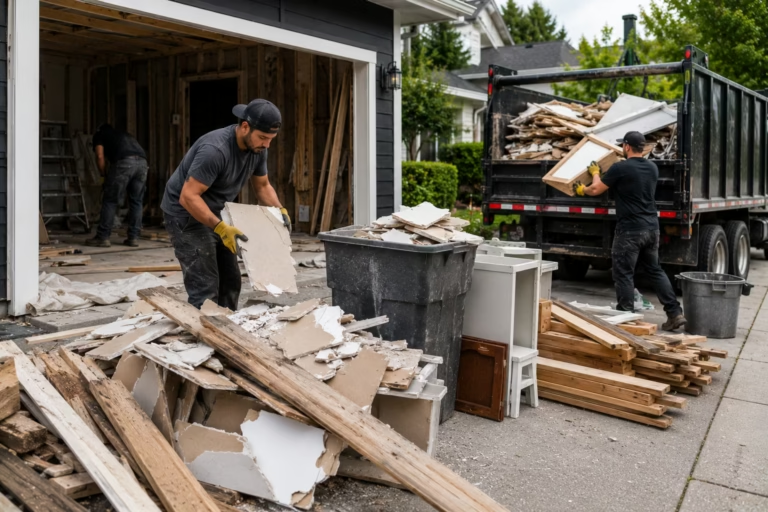
3. Estimate debris by material type
Make a short list of what will come out. Common renovation materials include drywall, wood, flooring, cabinets, baseboards, doors, trim, tile, fixtures, insulation, scrap metal, cardboard, and packaging. Each material behaves differently in a bin.
Drywall and flooring can stack flat. Cabinets and furniture create air gaps. Tile and mortar are dense. Long trim or wood offcuts can stick out if loaded poorly. Material type is one of the strongest clues for choosing the right bin size for your renovation project.
4. Consider whether the debris will come out all at once
Some projects create debris in one heavy demolition day. Others create waste slowly over several days or weeks. A DIY renovation may need a bin that stays longer. A contractor-led demolition may need a larger bin or a planned swap-out after the first phase.
The right bin size for your renovation project should match the schedule. If debris will build over time, a bin on-site may be better than repeated pickup requests. If everything is already staged, crew-loaded removal may be more efficient.
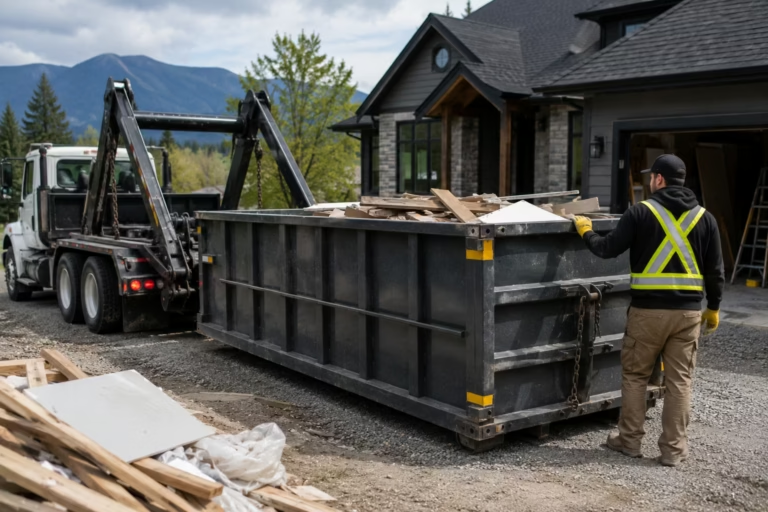
5. Check the placement area before choosing size
The bin needs a safe place to sit. Driveways are usually easiest, but not every driveway works. Steep slopes, low branches, overhead wires, narrow lanes, parked vehicles, strata rules, and shared access can limit placement.
A bin that fits the debris may not fit the property. When choosing the right bin size for your renovation project, take photos of the placement area and share them before delivery.
6. Plan the loading path
Think about how debris will move from the work area to the bin. Long carries add labour. Stairs and tight hallways slow loading. Finished floors may need protection. A bin placed too far away can make cleanup inefficient.
The best bin location balances convenience and access. It should reduce carrying distance without blocking trades, deliveries, neighbours, tenants, garage access, or emergency routes.
7. Watch for restricted or suspect materials
Not every renovation material belongs in a standard bin. Hazardous chemicals, asbestos, flammable products, biohazards, and unknown substances require different handling. Older drywall, flooring, insulation, ceiling texture, and adhesives may need assessment before disturbance.
WorkSafeBC provides information on asbestos hazards in older B.C. buildings, and the City of Vancouver notes that older drywall may contain or be contaminated with asbestos. Safety planning is part of choosing the right bin size for your renovation project because restricted materials should not be mixed into a regular load.
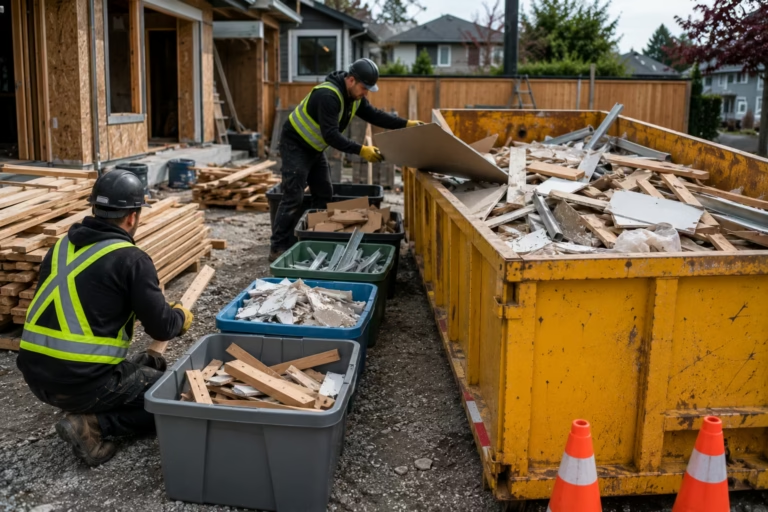
8. Ask whether sorting will improve the plan
Some renovation debris can be sorted for recycling, reuse, donation, or scrap recovery where practical. Clean wood, scrap metal, cardboard, and reusable fixtures may have better paths than mixed disposal. Sorting can also make the bin easier to load and quote.
Metro Vancouver’s construction and demolition waste guidance encourages recycling and reuse planning for building materials. If your renovation includes several material types, sorting can help you choose the right bin size for your renovation project more accurately.
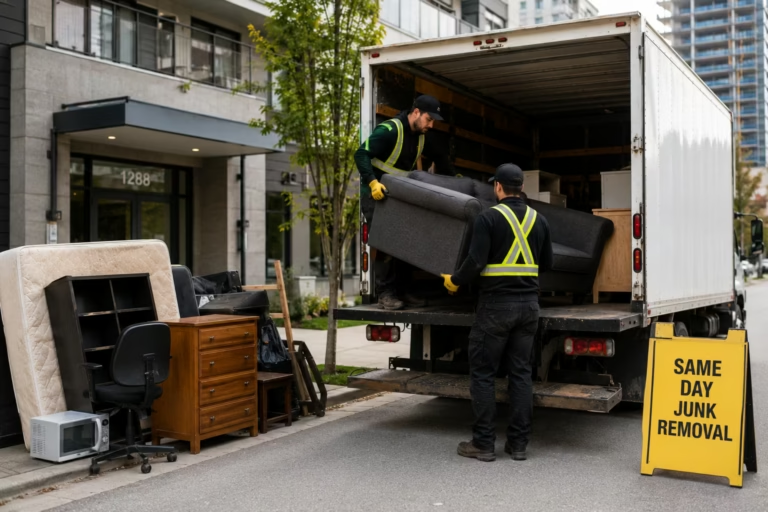
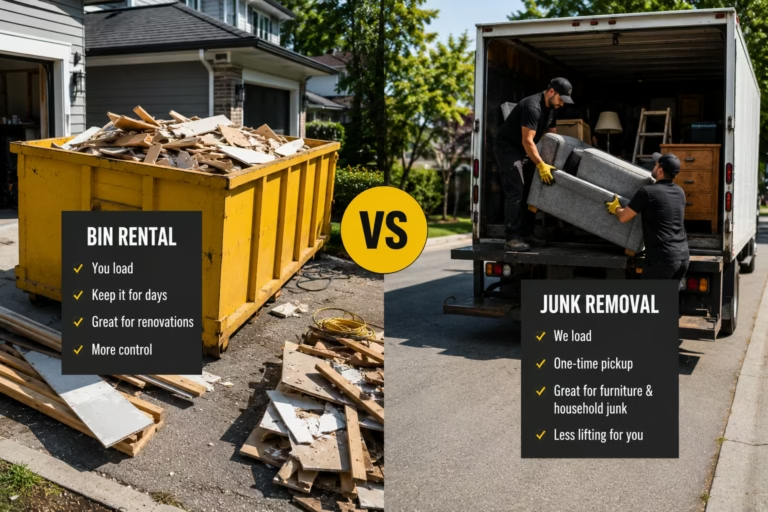
9. Compare bin rental with junk removal
A bin is useful when debris will be generated over time. Full-service junk removal may be better when the debris is already ready to go and you want a crew to load it. Some projects use both: junk removal for furniture or appliances, and bin rental for renovation debris.
The right bin size for your renovation project depends partly on whether you actually need a bin. If access is tight, parking is limited, or the building does not allow bin placement, crew-loaded removal or live loading may be the more practical option.
What Size Bin Do You Need for a Kitchen Renovation?
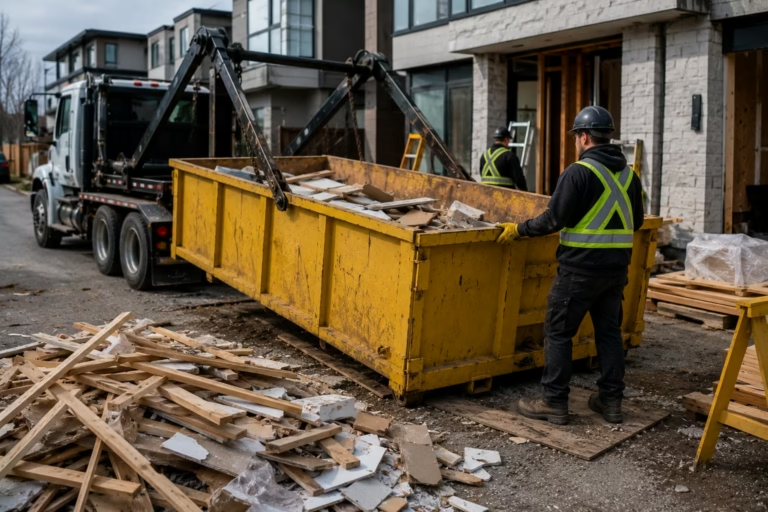
A kitchen renovation usually creates bulky mixed debris. Cabinets, drawers, countertops, backsplash, flooring, sink fixtures, packaging, trim, and old appliances can fill a bin quickly. Even a small kitchen can produce more waste than expected because cabinetry takes up irregular space.
The right bin size for your renovation project depends on whether the kitchen is being fully demolished or lightly updated. If you are only replacing cabinets and countertops, the load may be mostly bulky. If tile, drywall, flooring, and appliances are included, the job may need more careful planning.
Appliances should be discussed separately. Refrigerators, stoves, dishwashers, and range hoods may have different recycling or removal paths than general renovation debris. Keeping appliances separate can make the cleanup more organized.
For kitchen remodels that also include renovation debris, Rocky Junk Removal’s garbage bin rental service can help match the container to the job scope, access, and timeline.
What Size Bin Do You Need for a Bathroom Renovation?
Bathroom renovations often produce smaller but heavier loads. Tile, mortar, backer board, tubs, toilets, vanities, drywall, mirrors, flooring, and fixtures can add weight quickly. The bin may not look full before the load becomes heavy.
The right bin size for your renovation project may be a smaller container if dense materials are involved. This is especially true for tile removal, plaster, masonry, concrete, or heavy flooring materials. Weight planning helps avoid unsafe loads and pickup delays.
Older bathrooms also require safety review. If the home is older, do not disturb suspect drywall compound, flooring, ceiling texture, insulation, or adhesives without proper assessment. Bin size planning should not override asbestos or hazardous material precautions.
If the bathroom renovation is part of a larger interior remodel, a staged bin plan may work better than one large bin. The first pickup may handle demolition debris, while a later pickup handles packaging and finishing waste.
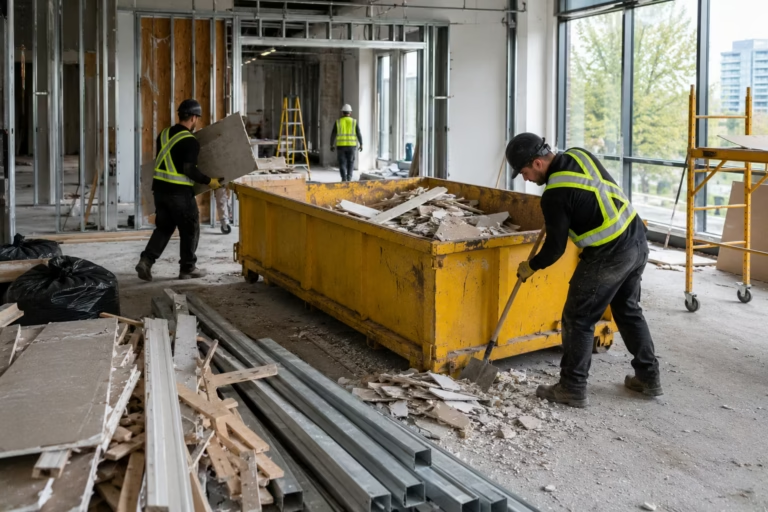
What Size Bin Works for Flooring, Drywall, and Interior Demolition?
Flooring and drywall projects can create a large amount of flat material. Carpet, underlay, laminate, hardwood, baseboards, drywall sheets, doors, and trim may stack well if loaded carefully. However, loose piles can waste bin space.
For drywall, confirm whether the material is new, used, older, painted, mudded, or possibly asbestos-risk. Used drywall and older building materials can have special disposal considerations. Do not assume drywall can be mixed into every general renovation load.
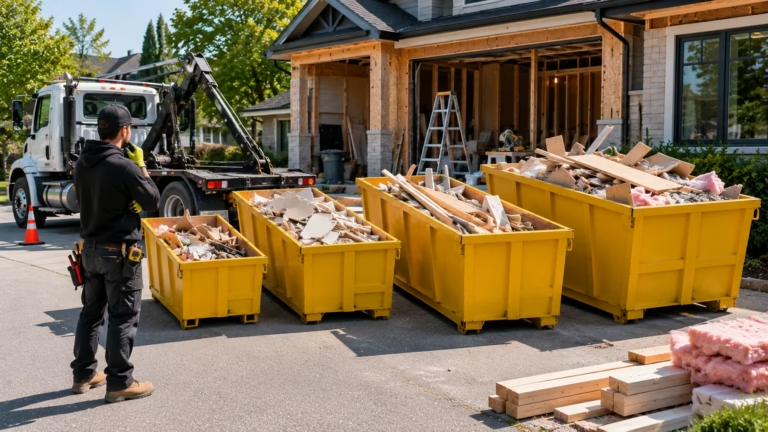
The right bin size for your renovation project also depends on whether the demolition is partial or full. A few rooms of flooring may need a moderate bin. A full interior strip-out may need a larger bin, staged hauling, or multiple pickups.
Rocky Junk Removal provides renovation debris removal for accepted non-hazardous material when customers need debris hauled from an active remodeling site.
Bin Rental vs Crew-Loaded Removal
Bin rental is usually the better option when debris will build over several days. It gives the renovation team a central place to load waste as demolition, removal, and cleanup progress. This is useful for DIY projects, contractor-managed renovations, and staged remodels.
Crew-loaded removal is usually better when the debris is already staged and the customer does not want to load a bin. It is also useful for apartments, condos, commercial units, and properties with no safe place to leave a bin.
Choosing the right bin size for your renovation project may involve deciding that a bin is not the best option. If the debris is ready now, if the access window is short, or if building rules prevent bin placement, a truck-and-crew service may be cleaner.
For mixed residential cleanups that include furniture, appliances, and household junk, Rocky Junk Removal’s residential junk removal service may be more practical than a renovation bin.
Safety Rules Before Loading a Renovation Bin
Safe loading is part of using a bin properly. Keep debris below the fill line, avoid sharp material sticking out, and do not stack material in a way that can shift during transport. Heavy items should be loaded carefully and evenly.
Do not place hazardous chemicals, asbestos, flammable products, biohazards, fuel, solvents, pesticides, or unknown substances in the bin. These materials require proper handling and should be kept separate from standard junk and renovation debris.
The right bin size for your renovation project should make safe loading easier. If the bin is too small, people may be tempted to overfill it. If the bin is too large for heavy debris, the load may become unsafe before the container looks full.
Children, pets, tenants, staff, and visitors should stay away from the loading area. Renovation debris can include nails, sharp edges, broken tile, dust, glass, and heavy material.
Renovation Bin Size Checklist
Use this checklist before choosing the right bin size for your renovation project:
- List the rooms or areas being renovated.
- Identify the main debris types, including wood, drywall, flooring, tile, cabinets, fixtures, and packaging.
- Separate bulky materials from dense materials such as tile, concrete, stone, brick, plaster, or soil.
- Confirm whether old drywall, flooring, insulation, ceiling texture, or adhesives may need asbestos assessment.
- Take photos of the debris, work area, driveway, lane, and bin placement location.
- Measure or review the loading area if access is tight.
- Check for overhead wires, low branches, slopes, parked cars, and shared access.
- Confirm strata, property management, landlord, or commercial loading rules.
- Ask whether the quote includes delivery, pickup, disposal, rental period, and weight allowance.
- Do not place hazardous chemicals, asbestos, flammable products, or biohazards in the bin.
- Decide whether bin rental, crew-loaded removal, live loading, or staged hauling is the best option.
- Schedule delivery before demolition starts so debris has a clear destination.
Common Bin Sizing Mistakes to Avoid
The first mistake is choosing based only on price. A smaller bin may look cheaper but can cost more if it fills too early and requires another haul. The more useful question is whether the bin matches the debris type and project schedule.
The second mistake is ignoring weight. Heavy materials can exceed safe hauling limits even when the bin is not full. Tile, concrete, brick, stone, soil, and plaster should always be discussed before booking.
The third mistake is forgetting access. The right bin size for your renovation project must also fit the property. If the truck cannot place or retrieve the bin safely, the chosen size does not matter.
The fourth mistake is mixing restricted or unknown materials into a general load. If a material is suspect, chemical, flammable, asbestos-risk, or hazardous, keep it out of the bin and arrange proper assessment or disposal.
The fifth mistake is waiting until debris is already piled everywhere. A bin should be part of the renovation plan before demolition starts, not a last-minute response after the site becomes cluttered.
Local Bin Planning Across the Lower Mainland
Local conditions affect bin choice. Vancouver properties may have narrow lanes and limited street access. Burnaby homes may have steep driveways or strata rules. Surrey and Langley properties may have more space but still need truck access. Richmond, Delta, Abbotsford, Maple Ridge, Chilliwack, and Pitt Meadows can all present different placement conditions.
Choosing the right bin size for your renovation project means considering the property as much as the debris. A bin that works for a detached home may not work for a condo, townhouse complex, commercial loading bay, or active job site.
Rocky Junk Removal serves Vancouver, Burnaby, Surrey, Richmond, Delta, Langley, Abbotsford, Maple Ridge, Chilliwack, Pitt Meadows, and nearby Lower Mainland communities. Customers can review broader local coverage through the service area page.
When requesting service, include the city, property type, access details, photos, material list, and preferred delivery window. This makes the bin recommendation more accurate.
Book the Bin Before Cleanup Becomes the Bottleneck
A renovation project can slow down quickly when debris has nowhere to go. Old cabinets block the garage. Drywall piles up in the hallway. Flooring scraps fill the driveway. Trades lose time moving material instead of working on the next phase.
Choosing the right bin size for your renovation project gives the cleanup a clear structure. It keeps debris contained, supports safer loading, and helps the work area stay ready for demolition, rough-in, finishing, and final cleanup.
To book a bin or compare debris removal options, send Rocky Junk Removal the project details, photos, debris type, access notes, and preferred timing through the contact page. Clear information helps the team recommend the right bin, pickup schedule, or hauling option.
Right Bin Size for Your Renovation Project: Final Takeaway
The right bin size for your renovation project depends on scope, material type, debris weight, site access, rental period, safety requirements, and whether the waste will build up over time. A small bathroom, full kitchen demolition, flooring project, basement renovation, and contractor-led interior strip-out each need a different cleanup plan.
Rocky Junk Removal provides bin rental, renovation debris removal, construction debris hauling, residential junk removal, and commercial cleanout support across Vancouver and the broader Lower Mainland. With the right plan, choosing the right bin size for your renovation project becomes less about guessing and more about matching the bin to the real work happening on-site.